Grout may be one of the smallest parts of your home, but it plays a huge role in keeping your tiles looking their best. Over time, however, grout can get discolored and grimy, making even the cleanest floors or walls look dirty.
If you’ve ever wondered how to tackle grout stains without resorting to harsh chemicals, let me tell you about my go-to method—cleaning grout with baking soda and white vinegar. It’s natural, effective, and incredibly satisfying to see the results.
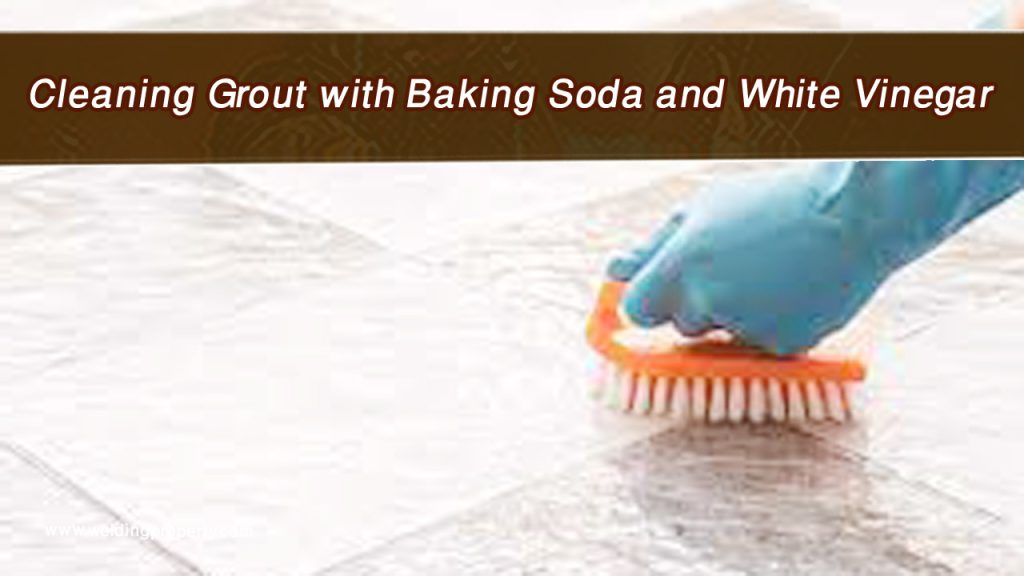
Image by gulisa-optik.de
Why Baking Soda and White Vinegar Work Wonders on Grout
Baking soda and white vinegar are a powerful duo when it comes to cleaning. Baking soda’s mildly abrasive texture helps lift dirt and grime, while white vinegar’s acidic properties break down tough stains and kill bacteria. Together, they create a fizzing reaction that loosens grime, making it easy to wipe away. The best part? These ingredients are non-toxic and budget-friendly.
Preparing for Grout Cleaning
Before you start, it’s important to gather all the materials and prepare the area. Cleaning grout can be a messy process, so having everything ready will save you time and effort.
What You’ll Need:
- Baking soda
- White vinegar
- A spray bottle
- A small bowl
- Warm water
- A toothbrush or grout brush
- A microfiber cloth or sponge
- Gloves (optional, but recommended)
Steps to Clean Grout with Baking Soda and White Vinegar
Let me walk you through this process step-by-step. It’s easy, and you’ll be amazed at the results.
Step 1: Make a Baking Soda Paste
Start by creating a thick paste with baking soda and water. In a small bowl, mix about three parts baking soda with one part water. The paste should be thick enough to stick to the grout lines without sliding off.
Step 2: Apply the Paste to Grout Lines
Using your fingers or a small spatula, apply the baking soda paste directly to the grout lines. Make sure to cover all the stained areas. If you’re working on a large area, it’s best to do this in sections.
Step 3: Spray White Vinegar
Pour white vinegar into a spray bottle and lightly spritz it over the baking soda-covered grout. You’ll notice a fizzy reaction as the vinegar interacts with the baking soda. This fizzing action helps loosen dirt and grime from the grout.
Step 4: Let It Sit
Patience is key here. Allow the baking soda and vinegar mixture to sit on the grout for at least 10-15 minutes. This gives the solution time to break down tough stains and disinfect the area.
Step 5: Scrub (Lightly!)
Take a toothbrush or grout brush and gently scrub the grout lines. The baking soda paste will make this step easier, as it lifts the grime. For stubborn stains, you may need to scrub a little more, but the effort will be minimal compared to traditional cleaning methods.
Step 6: Wipe Clean
Use a damp microfiber cloth or sponge to wipe away the baking soda and vinegar residue. Rinse the cloth or sponge frequently to avoid spreading dirt around.
Step 7: Rinse and Dry
Finally, rinse the area with warm water to remove any remaining residue. Dry the tiles and grout with a clean microfiber cloth to prevent water spots.
Tips for Better Results
- Work in Sections: If you’re cleaning a large area, work in small sections to ensure the paste doesn’t dry out.
- Use Gloves: While baking soda and vinegar are natural, gloves can protect your hands from dryness.
- Seal the Grout After Cleaning: To keep your grout looking clean longer, apply a grout sealer. This creates a protective barrier against stains and dirt.
Common Grout Issues and How to Address Them
Problem: Stubborn Stains
For extremely stubborn stains, repeat the process or add a small amount of dish soap to the baking soda paste for extra cleaning power.
Problem: Mold and Mildew
If you’re dealing with mold or mildew, add a few drops of tea tree oil to the vinegar spray. Tea tree oil has natural antifungal properties that can help eliminate mold.
Problem: Discoloration
Sometimes, grout can become permanently discolored. If cleaning doesn’t restore the original color, consider using a grout colorant to refresh the look.
Comparing Baking Soda and Vinegar to Other Grout Cleaning Methods
| Cleaning Method | Effectiveness | Cost | Eco-Friendliness |
|---|---|---|---|
| Baking Soda & Vinegar | High | Low | Excellent |
| Commercial Cleaners | High | Medium-High | Varies |
| Steam Cleaning | Moderate-High | High | Excellent |
| Oxygen Bleach | Moderate | Medium | Good |
Preventing Future Grout Stains
Keeping grout clean is much easier than tackling built-up grime. Here are some simple tips to prevent future stains:
- Wipe Down Tiles Regularly: After showers or mopping, wipe down the tiles and grout with a dry cloth to remove moisture.
- Use Rugs and Mats: Place rugs in high-traffic areas to minimize dirt and grime on the tiles.
- Clean Spills Immediately: Address spills on tiled surfaces promptly to prevent staining.
FAQs
Can I use this method on colored grout?
Yes, but test a small area first to ensure the vinegar doesn’t affect the grout’s color.
Is baking soda and vinegar safe for natural stone tiles?
No, avoid using vinegar on natural stone as it can damage the surface. Use a pH-neutral cleaner instead.
How often should I clean grout?
Clean grout monthly for maintenance and perform a deep clean every three to six months.
What if my grout is still dirty after using this method?
Repeat the process or consider using a professional-grade grout cleaner.
Can I use a steam cleaner with this method?
Yes, steam cleaning after applying the baking soda and vinegar can enhance the results.
Conclusion
Cleaning grout with baking soda and white vinegar is a simple, natural, and effective solution that saves you time and money. This method not only removes dirt and stains but also disinfects the area, leaving your tiles and grout looking fresh and renewed.
It’s safe for your home and the environment. With a little effort and these easy steps, you can transform your grout lines and enjoy the satisfaction of a sparkling clean floor or wall. Give it a try, and you’ll see just how rewarding it can be!

I’m Joseph, the proud author of NewCleaningTips.com! With a passion for keeping homes spotless and organized, I created this blog to help others simplify their cleaning routines and achieve a healthier, more comfortable living environment.
With years of hands-on experience and a dedication to research, I specialize in providing practical cleaning advice, expert product recommendations, and eco-friendly alternatives for everyday challenges. If it’s tackling stubborn stains, organizing cluttered spaces, or exploring innovative cleaning methods, my goal is to share tips that make life easier and more efficient.
At NewCleaningTips.com, trust and quality are my top priorities. Every guide and recommendation is thoughtfully crafted to ensure it’s both effective and reliable, so you can approach your cleaning tasks with confidence.
Let’s transform your space into a sanctuary—one cleaning tip at a time!